| Note: There are two types of headers one for electrical and a Top Channel
for non electrical. Check layout sheet for material supplied. |
| The Sidewall Modules will have solid material above the windows. The
Solid material will give you the ability allow for the slope in the roof line. Remember
that if you have a foundation that slopes, you must cut the slope on the kickplates before
you cut the slope for the roof. As in all the room layouts, the modules are numbered
starting from the left sidewall as you face the front of the room from the outside. Check
your layout sheet for any solid material that may be in the front comer of the sidewall
prior to the first module. |
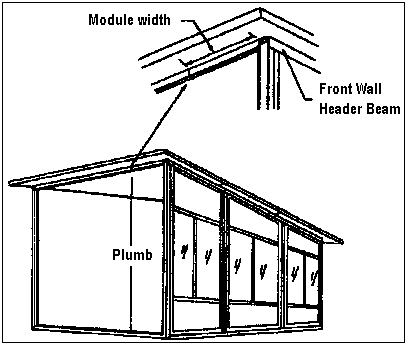
Measure the first modules width mark that dimension on Sidewall Header and Bottom
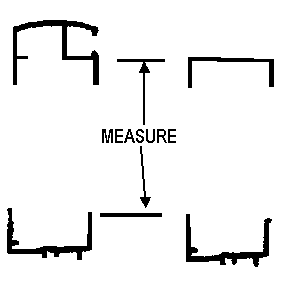
Track. Diagram 8.5 At these marks measure between the Bottom Track and the inside
of the Header Beam. Diagram 8.4 deduct 1/2" from this dimension to arrive at
the size to mark on the module left side mullion now measure the same way at the frontwall
and mark the right side mullion using a straight edge scribe a line from mark to mark this
gives you the cut line for cutting module.
To slide the module into position, you may
have to start the module closer to the house wall to slide it into place because of the
narrowing of the opening. Repeat this process until your last module, (the module closest
to the house wall). |
DIAGRAM 8.4
Electrical
Non-Electrical

DIAGRAM 8.5

|

