DIAGRAM 4.12
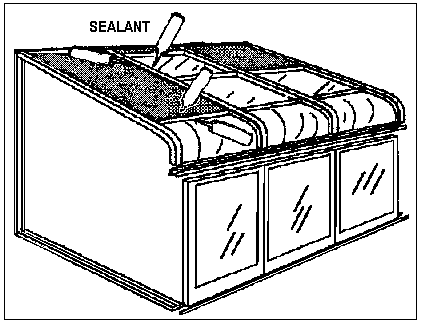
The Roof may not leak without additional sealing,
but is not recommended. To ensure a long dry life of the room, run a small fine bead of
1200 silicone(not poly-urethane) on the sides of every Rafter Cap the full length from the
Lock Cap in front to the Attachment Channel at the house wall. This small bead should
encompass the bulb vinyl on the outside of the Rafter Cap and the Insulated Roof Panel and
or Glass. By pressing this in with your index finger, this bead will grow and be plenty to
seal the Rafter and roof together. The fewer obstructions on the roof, the faster the
water wheel run off the roof. Do the same sealing procedure to the Top Caps in the roof.
DIAGRAM 4.13
Securing the Top Caps to the Solid to Glass Stiffener. Using the
# 8 x 518" machine screws with washer place a dab of silicone on the tip and install
through the pre-punched holes in the bottom of the Stiffeners from inside the room.
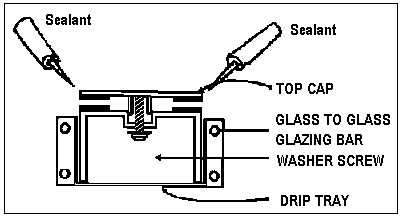
DIAGRAM 4.14
Securing the Top Caps to the Glass to Glass Stiffener, Using the
# 8 x 518" machine screws with washer place a dab of silicone on the tip and install
through the pre-punched holes in the bottom of the Stiffeners from inside the room. Now
install the Drip Tray to the Rafter sides with #8 Phillips Tek Screws through the
pre-punched holes in brackets |
DIAGRAM 4.12
Solid to glass Stiffener
DIAGRAM 4.12
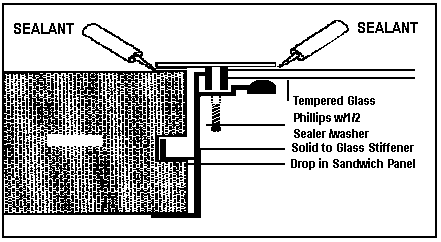
Solid to glass Stiffener
DIAGRAM 4.12
|