| DIAGRAM 5.5 Glass or Acrylic
If your roof has glass panels they will be
Tempered and can not be out,The only adjustment is in the insulated Roof Panels or special
order tempered glass The front of each bay starts off with an insulated roof panel if the
panels are in line you can secure the Solid to Glass and the Glass to Glass Stiffeners
with # 8 x 1/2' Phillp Tek Screws through the pre-punched holes in the brackets of the
Stiffeners, into the side of the Rafters-Make sure the bottom leg of the Stiffener is
lying flat on the inside leg of the Rafter.
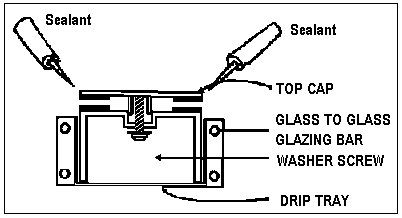
DIAGRAM 5.6
Securing the Top Caps to the Solid to Glass Stiffener. Using the
# 8 x 518" machine screws with washer place a dab of silicone on the tip and install
through the pre-punched holes in the bottom of the Stiffeners from inside the room.
DIAGRAM 5.7
Securing the Top Caps to the Glass to Glass Stiffener. Using the
# 8 x 5/8" machine screws with washer place a dab of silicone an the tip and install
through the pre-punched holes in the bottom of the Stiffeners from inside the room. Now
install the Drip Tray to the Rafter sides with #8 Phillips Tek Screws through the
pre-punched holes in brackets. |
DIAGRAM 5.5
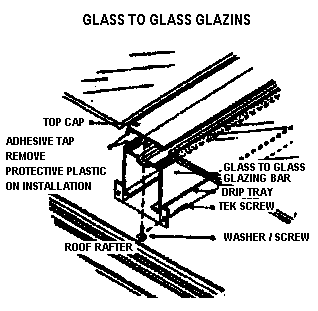
DIAGRAM 5.6
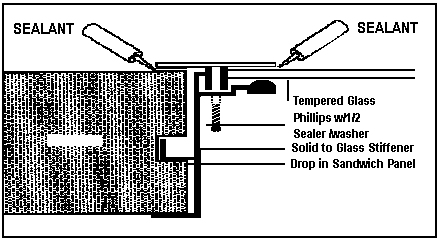
DIAGRAM 5.7
|