Page #12 |
INSTALLATION MANUAL |
STEP 4: PAGE 3 OF 6 |
CLASSIC CURVED ROOF SUNROOM: Roof solid and Glass Installation
DIAGRAM 4.4

DIAGRAM 4.4
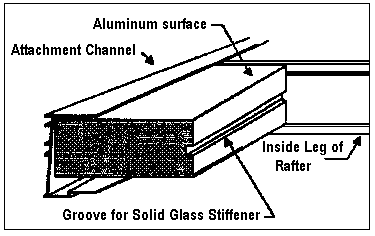
Refer to the layout sheet of materials to confirm the dimensions of the Insulated Roof panel & glass. There are two sides to the Insulated Roof Panels, the aluminum side should face the sky & the grooved end should face the front wall of the room. The Roof Panels should be placed between each Rafter, resting on the inside leg of each Rafter. After all roof panels have been placed between the Rafters, push each Roof Panel to the back of the Attachment Channel.The front end of the Roof Panels should line up uniformly. If this line is off, you may adjust this by pulling the roof solids out of the attachment channel up to 1" or by cutting the back side of the Roof Panels to the desired length. TAKE YOUR TIME ON THIS STEP IT WILL DETERMINE HOW YOUR ROOM TURNS OUTDIAGRAM 4.5

DIAGRAM 4.5
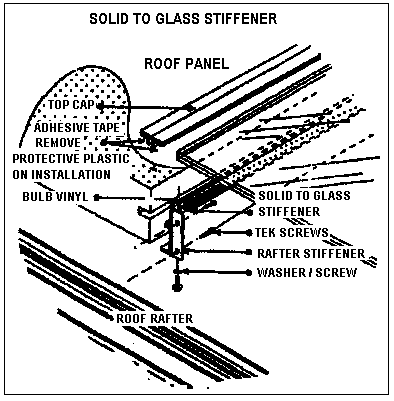
Once Roof Panels are in line the Solid to Glass Stiffener should be placed on the front of the Roof Panels. The groove on the front of the Panels should mate with the the groove on the back side of the Solid to Glass Stiffener see Diagram 4.5