Page #23
|
INSTALLATION MANUAL
|
STEP 6: PAGE 3 OF 3
|
CLASSIC WEATHER GUARD FOAM ROOF SUNROOM
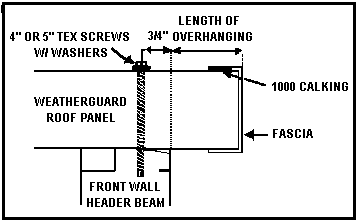
| There will be a Front and side Facia that will cover the
outside perimeter of the Weatherguard Roof. This piece may look like the Attachment
Channel on a 3" Weatherguard Roof.Cut to length and secure to the roof. |
 |
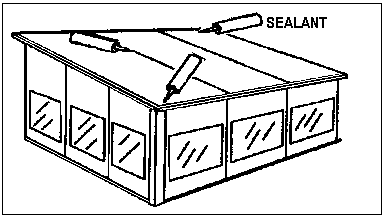
| The roof may not leak without additional sealing,but it is
not recommended. To ensure a long dry life of the room, run a small bead bead of 1200
silicone (not poly-urethane)on every seam . |
 |
The optional Gutter System should be attached in the same way as the
Facia. Dams may be required at each end of the Gutter. Downspouts and Elbows will be
required at the corners of the Gutter to channel the water from the roof. When all Facia
pieces and or Gutters have been installed, run a bead of Silicone at the junction of the
roof panels and the Facia. The Downspouts and Elbows are usually installed a maximum of
20' from each other. A hole saw can be used to drill a hole for the Downspout dropout in
the Gutter. The dropout should be secured and sealed to the bottom of the Gutter. And any
necessary elbows and downspouts should be added to the dropout. The Downspout connector
should be secured to the front of the outside corners to accept the downspout.
|

