Page #11 |
INSTALLATION MANUAL |
STEP 4: PAGE 2 OF 6 |
CLASSIC CURVED ROOF SUNROOM: BEAM ROOF INSTALLATION
DIAMGRAM 4.2
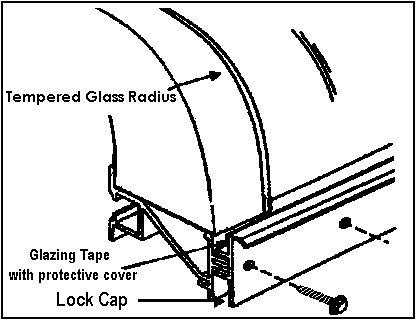
DIAMGRAM 4.2
Place the Curved Eave Header Lock Cap on the Curved Eave Header using #8 x 3/4" tek Screws. Leave screws loose to allow any adjustment with the Tempered Radius. Slide the Tempered Glass Radius into the Curved Eave Header Lock Cap, slowly lower the glass onto the Rafter.
When all Radius panels have been set into place on top of the Rafters, the inside edges should line up with each other.
DIAMGRAM 4.3
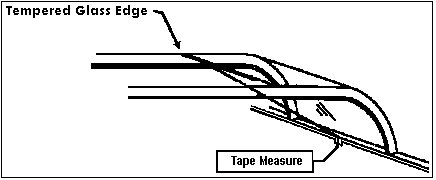
DIAMGRAM 4.3
Check for uniformity by measuring the distance from the inside edge of the Tempered Radius to a fixed point on the Curved Eave Header. This uniform line is essential in the rest of the roof layout. If this line is off the rest of the pieces in the roof will not line up.
Once the Tempered glass radius is positioned, remove the protective cover from the glazing tape & tighten the LocCap Screws.