Page #13
|
INSTALLATION MANUAL
|
STEP 4: PAGE 4 OF 6
|
CLASSIC CURVED ROOF SUNROOM: Roof solid and Glass Installation
DIAGRAM 4.6
glass or acrylic
DIAMGRAM 4.7

If your room has glass radius, make sure everything fits in place.The Glass radius
cannot be cut, so your only adjustment is the roof panels.In one of the roof bays place
your roof glass into place (only if room has overhead glass.) See Diagrams 4.6 & 4.7
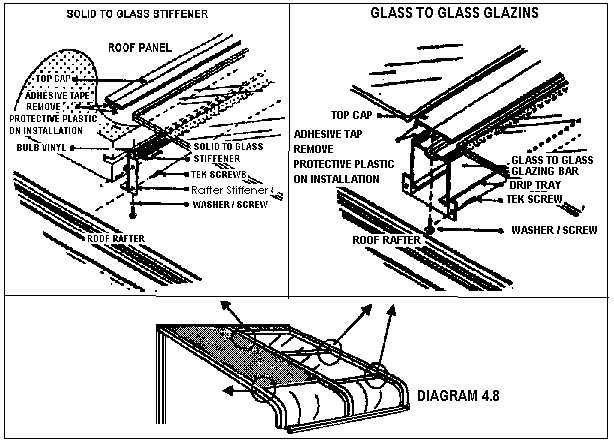
Once everything is fit & lined up proper, you can now secure the Solid to Glass
Stiffeners with # 8 Phillips Tek Screws through the pre-punched holes on the brackets of
the Stiffeners, into the side of the Rafters. Make sure the bottom leg of the Stiffener is
lying flat on the inside leg of the Rafter.
DIAGRAM 4.8 (acrylic)
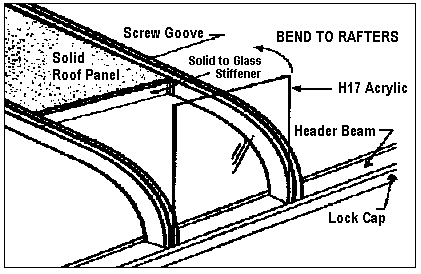
Recheck your Insulated Roof line with the Solid to
Glass Stiffener in place. If this line is straight,slide the H-17 Acrylic Radius between
the Lock Cap and the Header Beam, and bend the H-17 Acrylic Radius until it meets the bulb
vinyl on the Solid to Glass Stiffener. Mark the H-17 Acrylic Radius on the left side and
the right side just slightly past the bulb vinyl . |
DIAGRAM 4.8

|
|

