Page #14 |
INSTALLATION MANUAL |
STEP 4: PAGE 5 OF 6 |
CLASSIC CURVED ROOF SUNROOM: Roof solid and Glass Installation
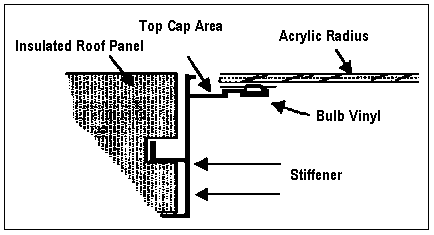
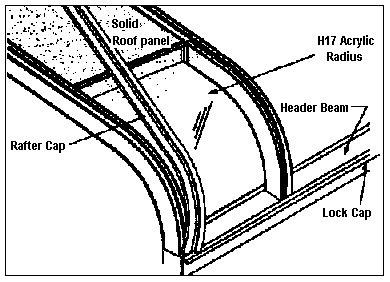
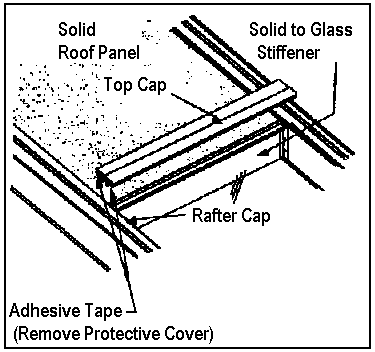
DIAGRAM 4.10 Place the first H-17 Acrylic Radius in the left bay and bend to contour of Rafter until it meets the Bulb Vinyl on the Stiffener.The Rafter Cap holds the Acrylic Radius in place and seals the Insulated Roof Panel to the Rafter. (There should be as many Rafter Caps as Rafters.) Place the first Rafter Cap on the Rafter starting tight against the Lock Cap on the Header Beam and running to the house wall. Secure the Rafter Cap to the left Rafter with # 8 x 1/2" phillips pan head machine screws through the pre-punched holes in the Rafter Cap.DIAGRAM 4.11 Now that the first Rafter Cap is in place you Have a starting point for the Top Cap of the first Stiffener. Peel the protective cover from both sides of the Top Cap carefully place the Top Cap tight against the Rafter Cap so the two legs called the male groove goes down into the Top Cap area shown in Dia. 4.11 Push the Top Cap down making sure the adhesive tape seals the Solid Roof Panel and the H-17 Acrylic or glass. Later you will secure the Top Cap with #8 x 5/8" machine screws with washers from inside the room. |
DIAGRAM 4.9
|


